RICOH 7503 @ Room 930 – Setup (MAC)
Step 1
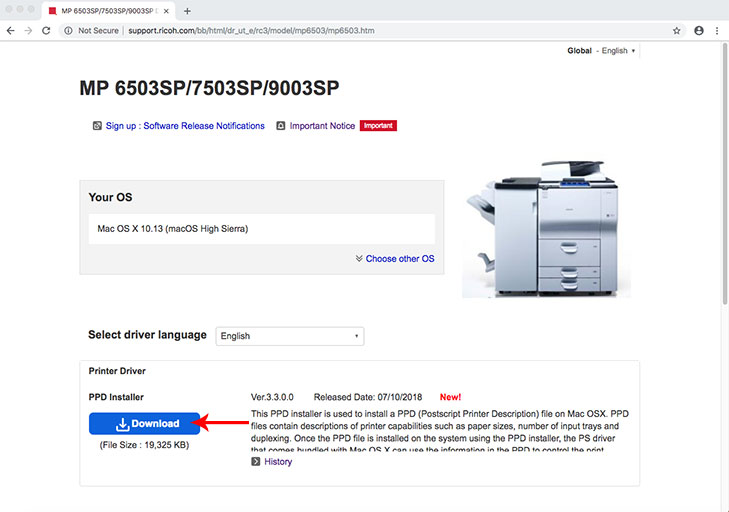
Download the printer driver at the following url and install it into your MAC computer.
http://support.ricoh.com/bb/html/dr_ut_e/rc3/model/mp6503/mp6503.htm
Step 2
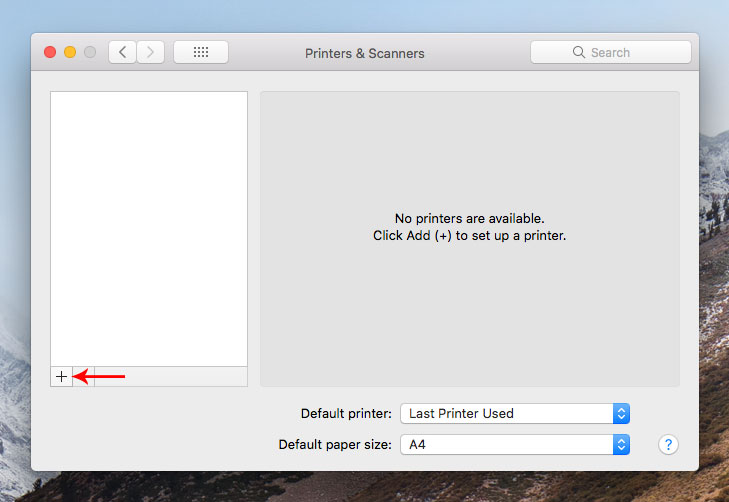
After installing the driver, go to “System Preferences” and select “Printers & Scanners”. Then, add a new printer.
Step 3
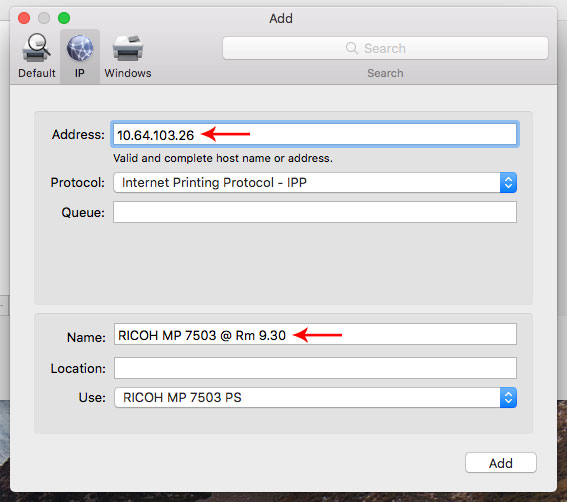
Select the tab “IP” on the top, input address “10.64.103.26” and name this printer. Kindly wait for a second, it will find the driver (RICOH MP 7503 PS) automatically. Then, click “Add” this printer.
Step 4
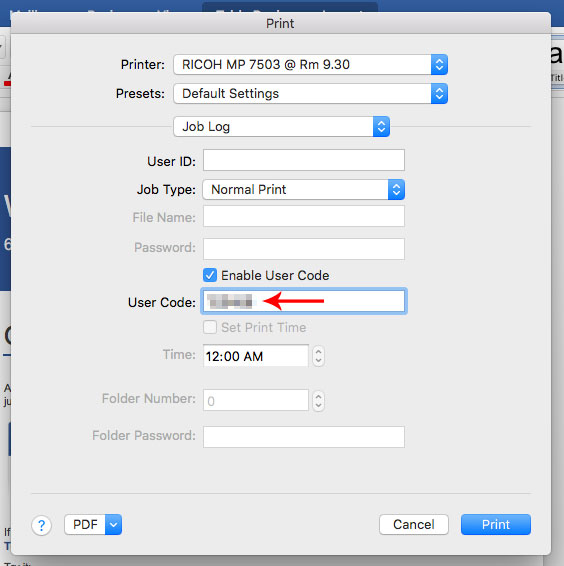
After adding a new printer, when you print your document, you need to select “Job Log” and input your user code.

Step 5
Check “Enable User Code” and input your user code (The code Golly created for you to use this printer for copying, scanning and printing).
Step 6
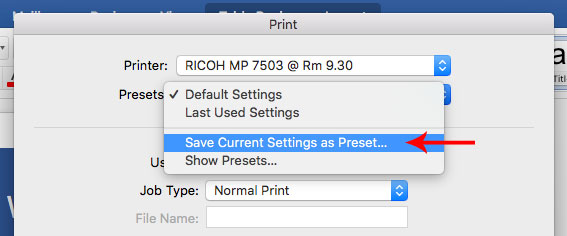
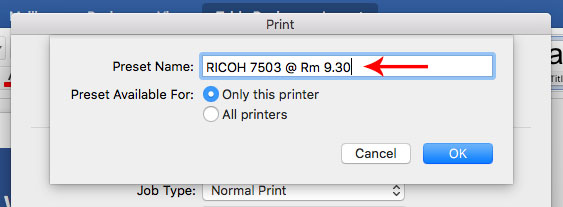
Save current settings, then next time you do not need to input your user code again for your printing.
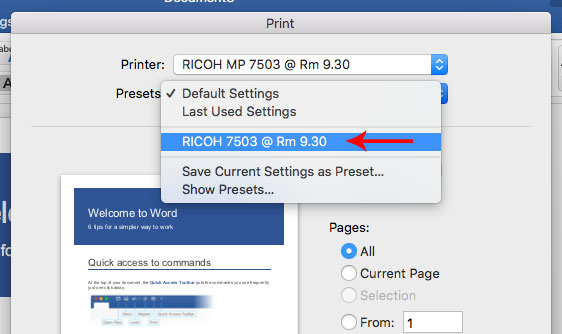
Step 7
Next time you print a document, just select your present, then print.